
Join together two pieces of knitting with a neat i-cord bind off edging. The i-cord can be worked in a contrasting colour or the same as the rest of the knitted item.
Refer to your pattern for full instructions and use the tutorial below to guide you through the process.
An i-cord may be worked over a variety of number of stitches. I am showing a 3 stitch i-cord below, easily adapt these instructions for the number of i-cord stitches indicated in the pattern you are following.
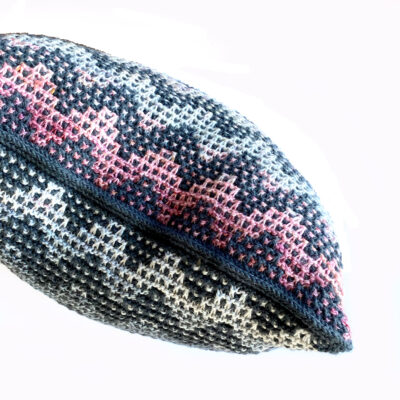
Join 2 sides together with a double i-cord bind off and create a neat contrasting edge as shown here on the Radvent pillow.
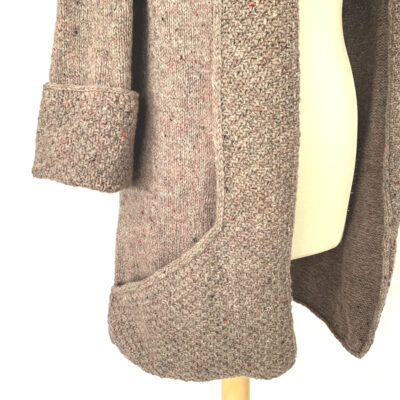
Double i-cord bind off is worked along the bottom of this Coatigan here to neatly join the the pocket with the bottom edge of the garment.
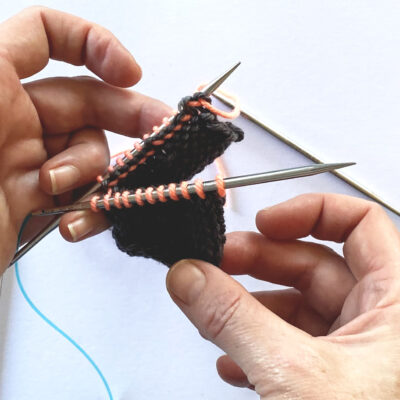
Begin with the two pieces you plan to join. In my sample here I have both wrong sides facing each other, as I did for the Radvent Pillow. The Coatigan will have a wrong side and a right side facing in so refer to your pattern for full instructions.
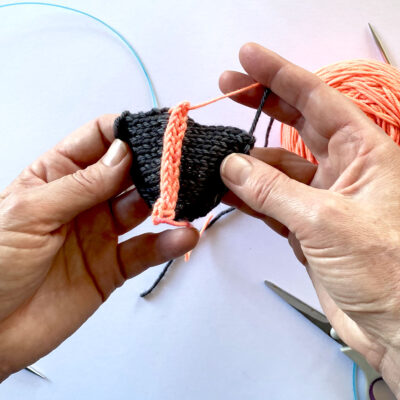
If working a contrasting i-cord colour, work one row with the contrasting yarn before working the bind off, as shown here.
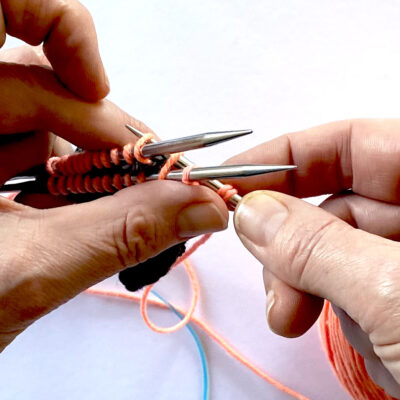
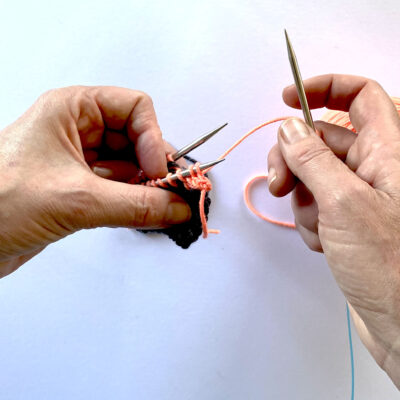
The live stitches will be on two needles held in the left hand, another needle used by the right hand will work the stitches.

Step 1: The first 3 stitches on the bottom left needle are the i-cord stitches. These were cast on for this example, alternatively your pattern may instruct you to pick up held i-cord stitches to continue an i-cord, refer to your pattern for full instructions.
In each case begin with the i-cord stitches as shown here, on the bottom left needle.
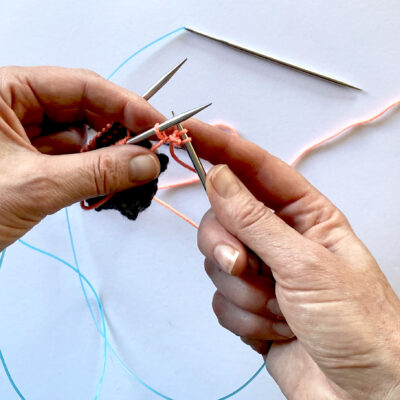
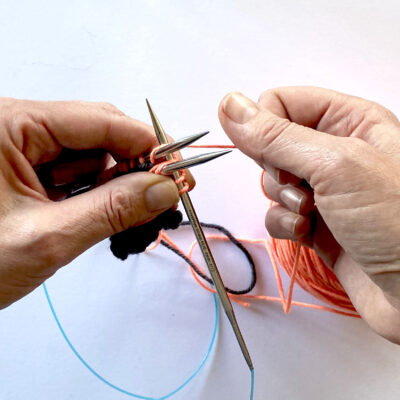
Step 2: K2: knit the first 2 i-cord stitches.
Step 3: k3tog-tbl; knit 3 together through the back of the loop.
Insert the right needle through the back of the 3rd i-cord stitch, then the first stitch on the bottom left needle followed by the first stitch in the top left needle and....
wrap working yarn around right needle to work the stitch.
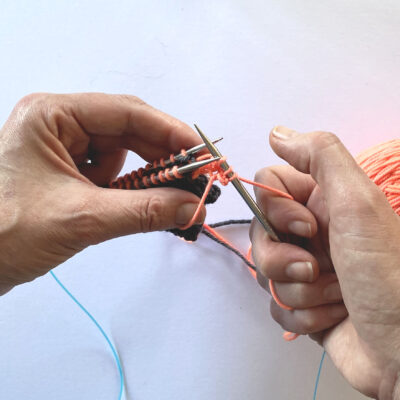
Pull the working yarn through the 3 stitches and slide off needle, leaving the single newly formed stitch to remain on the right needle.
2 stitches have now been cast off.
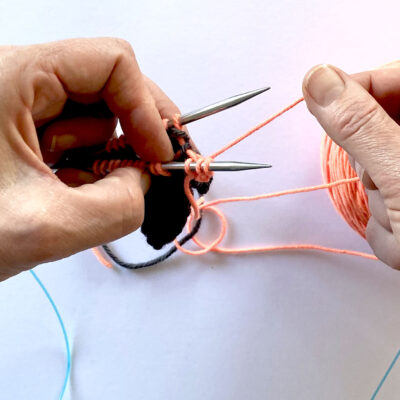
Step 4: Transfer the 3 i-cord stitches on the right needle back to the left needle.
Repeat steps 2 - 4 and see the i-cord begin to form.

Continue to repeat Steps 2 - 4; k2, k3tog-tbl, transfer the 3 stitches on the right needle back to the left needle, until three i-cord stitches remain.
Work the remaining stitches as directed by your pattern, or bind off using a regular bind off.
The finished result: two sides joined together with a double i-cord bind off.
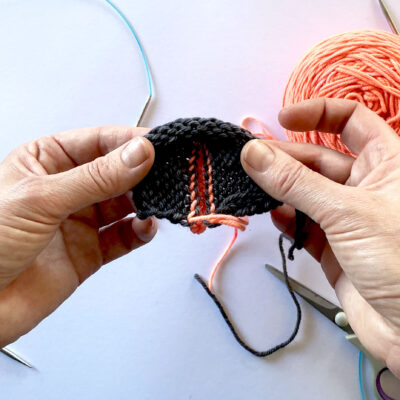
How it looks on the other side.