Join together the squares in your Radvent Throw with this simple crochet technique which results in a raised seam.
![](https://ambah.co/wp-content/uploads/2020/09/step-1-1-400x400.jpg)
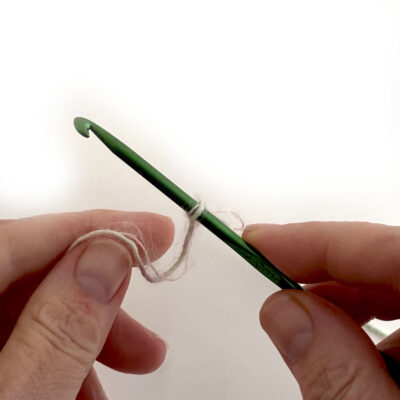
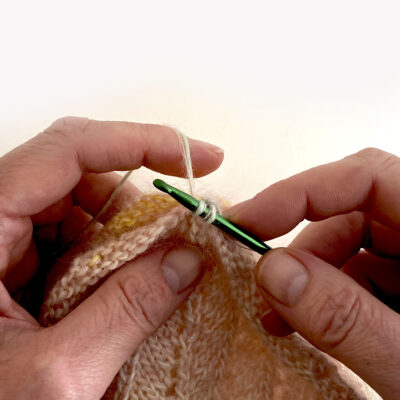
Step 1: Make a slip knot and place on crochet hook.
![](https://ambah.co/wp-content/uploads/2020/09/step-2-1-400x400.jpg)
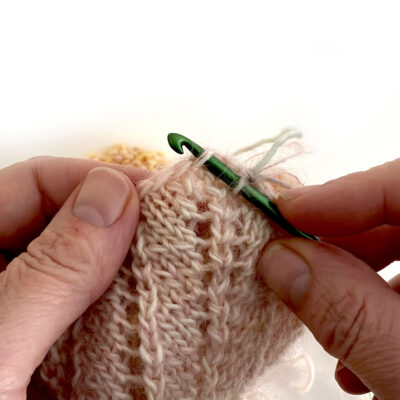
Step 2: With the right side of each square facing out, insert the hook through the front loop of the first stitch in the square closest to you
![](https://ambah.co/wp-content/uploads/2020/09/step-3-1-400x400.jpg)
Step 3: Now insert the hook through the back loop of the corresponding first stitch in the square furthest from you.
![](https://ambah.co/wp-content/uploads/2020/09/step-4-1-400x400.jpg)
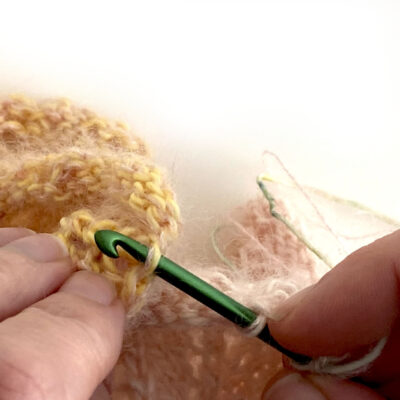
Step 4: Wrap working yarn around the crochet hook and pull through the two stitches.
![](https://ambah.co/wp-content/uploads/2020/09/step-5-1-400x400.jpg)
Step 5: Two stitches now on the hook and the first two stitch of each square joined together.
![](https://ambah.co/wp-content/uploads/2020/09/step-6-1-400x400.jpg)
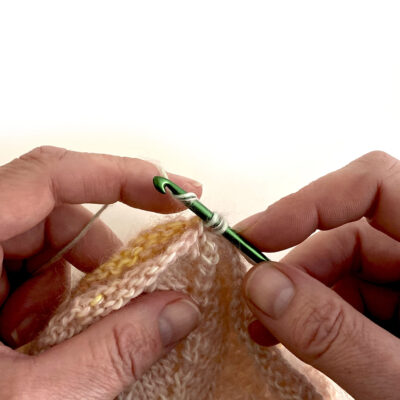
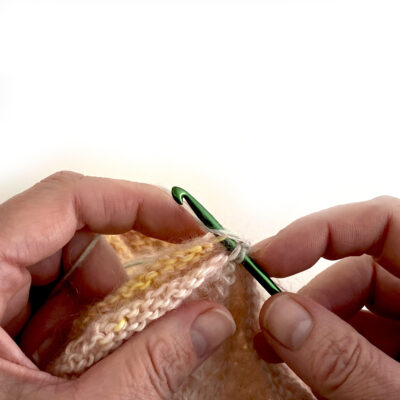
Step 6: Wrap yarn around the hook and pull through both of these stitches.
![](https://ambah.co/wp-content/uploads/2020/09/step-7-400x400.jpg)
Step 7: One stitch remaining.
![](https://ambah.co/wp-content/uploads/2020/09/step-8-1-400x400.jpg)
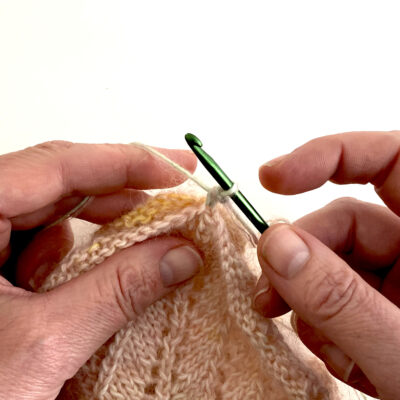
Repeat steps 2 - 7 until the two squares are joined along one edge.
![](https://ambah.co/wp-content/uploads/2020/09/step-9-1-400x400.jpg)
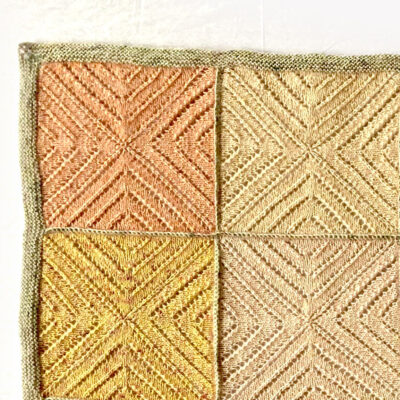
Take care to line up the pattern as you join each square by working the corresponding sts of the 2 squares being joined.
![](https://ambah.co/wp-content/uploads/2020/09/radvent-throw-joining-3-400x400.jpg)
![](https://ambah.co/wp-content/uploads/2020/09/Radvent-Throw-joining-2-2-400x400.jpg)
![](https://ambah.co/wp-content/uploads/2020/09/Radvent-Throw-cropped-400x400.jpg)
![](https://ambah.co/wp-content/uploads/2020/09/Radvent-Throw-400x400.jpg)